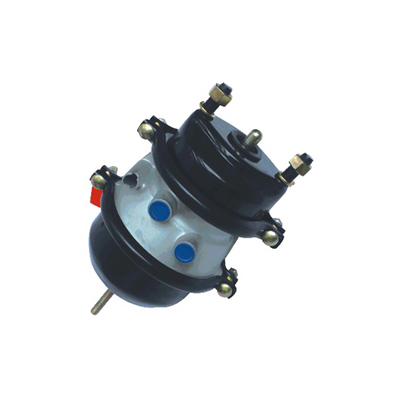
Adjusting the pushrod stroke length on a spring brake chamber is crucial for maintaining proper brake performance and safety. Here are some best practices for adjusting the pushrod stroke length:
1.Refer to Manufacturer Guidelines:
Start by consulting the manufacturer's documentation for the specific make and model of the spring brake chamber you're working with. These guidelines provide essential information on recommended stroke lengths and adjustment procedures tailored to the specific design.
2.Measure the Current Stroke Length:
Begin the adjustment process by accurately measuring the existing pushrod stroke length. Use a stroke indicator tool or a precision measuring device for this purpose. This measurement serves as a reference point for your adjustments.
3.Inspect for Wear and Damage:
Before proceeding with adjustments, perform a thorough visual inspection of the entire spring brake chamber assembly. Look for signs of wear, damage, or any indications of air leaks. Replace any components that show wear or damage, as these can interfere with the adjustment process and brake performance.
4.Release Air Pressure:
Ensure that the air pressure within the brake system is completely released. This is a critical safety step to prevent any unexpected brake engagement during the adjustment process. Always adhere to safety protocols.
5.Access the Adjustment Mechanism:
Depending on the type of spring brake chamber, you will need to access the adjustment mechanism. Some chambers have an external adjustment bolt or nut, while others require a specialized tool for proper adjustment. Refer to manufacturer guidelines for specific access instructions.
6.Loosen the Locking Nut:
If your spring brake chamber features a locking nut, start by loosening it before making any adjustments. This preliminary step allows for easier manipulation of the pushrod.
7.Turn the Adjustment Mechanism:
Follow the manufacturer's specified procedure for turning the adjustment mechanism. Typically, turning it clockwise will increase the pushrod length (thereby increasing the stroke), while turning it counterclockwise will decrease the length (reducing the stroke). Ensure that adjustments are made in small, incremental steps to facilitate precision.
8.Use a Stroke Indicator:
Continuously monitor the pushrod stroke length as you make adjustments using a stroke indicator tool. It is crucial to align the stroke length with the manufacturer's specifications for your particular application.
9.Secure the Locking Nut:
Once you have achieved the correct pushrod stroke length, secure the locking nut (if applicable) tightly. This step prevents unintended adjustments and helps maintain the desired setting.
10.Reconnect and Test:
Reconnect any components that were disconnected during the adjustment process. Ensure that the brake system is correctly pressurized. Conduct a comprehensive brake test to verify that the brakes engage and release as expected, confirming the effectiveness of your adjustments.
11.Document Adjustments:
Maintain meticulous records of the adjustments performed. Include details such as the pushrod stroke length, the date of adjustment, and any relevant notes regarding the condition of the brake chamber or related components. Documentation is essential for tracking maintenance history and ensuring compliance with regulations.
12.Regularly Inspect and Maintain:
Establish a regular inspection and maintenance schedule to monitor the condition of the spring brake chamber and the pushrod stroke length. Make necessary adjustments as part of routine maintenance to uphold safe and efficient brake performance.


The spring brake chamber is connected to the vehicle's air brake system and consists of two chambers: the service chamber and the spring chamber. The service chamber houses the diaphragm, which is connected to the brake shoe. When air pressure is applied, the diaphragm expands, pushing the brake shoe against the wheel drum, creating friction and stopping the vehicle.


 English
 Español


